|
Menu
Objektif
Kakitangan
Pembelajaran
Pengajian Teknikal
Pengajian Akademik
Kokurikulum
Galari Foto
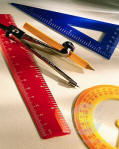

Set of 3 curves, 136mm,165mm and 318mm, in
plastic wallet. Used by draftsmen to help draw curved lines.
 |
|
|
TCV 1032
DRAFTING FUNDAMENTALS
The subject was designed to introduce the student to
technical drawing fundamental which provides the opportunity
to read, interpret and produce engineering
drawings.and blueprints. |
Semester 2
|
Scheme Of Work |
1 |
2 |
3 |
4 |
5 |
6 |
7 |
8 |
9 |
10 |
11 |
12 |
13 |
14 |
15 |
16 |
17 |
18 |
19 |
20 |
|
|
Lesson Plan Theory |
1 |
2 |
3 |
4 |
5 |
6 |
7 |
8 |
9 |
10 |
11 |
12 |
13 |
14 |
15 |
16 |
17 |
18 |
19 |
20 |
|
Lesson Plan Practical |
1 |
2 |
3 |
4 |
5 |
6 |
7 |
8 |
9 |
10 |
11 |
12 |
13 |
14 |
15 |
16 |
17 |
18 |
19 |
20 |
|
Job Sheet
|
1 |
2 |
3 |
4 |
5 |
6 |
7 |
8 |
9 |
10 |
11 |
12 |
13 |
14 |
15 |
16 |
17 |
18 |
19 |
20 |
|
Information Sheet |
1 |
2 |
3 |
4 |
5 |
6 |
7 |
8 |
9 |
10 |
11 |
12 |
13 |
14 |
15 |
16 |
17 |
18 |
19 |
20 |
|
Exercise
Sheet |
1 |
2 |
3 |
4 |
5 |
6 |
7 |
8 |
9 |
10 |
11 |
12 |
13 |
14 |
15 |
16 |
17 |
18 |
19 |
20 |
|
Nota Teori
|
1 |
2 |
3 |
4 |
5 |
6 |
7 |
8 |
9 |
10 |
11 |
12 |
13 |
14 |
15 |
16 |
17 |
18 |
19 |
20 |
|
Presentation |
1 |
2 |
3 |
4 |
5 |
6 |
7 |
8 |
9 |
10 |
11 |
12 |
13 |
14 |
15 |
16 |
17 |
18 |
19 |
20 |
|
Subjek Teori |
1 |
2 |
|
|
|
|
|
|
|
|
|
|
|
|
|
|
|
|
|
|
|
|
1 |
2 |
|
|
|
|
|
|
|
|
|
|
|
|
|
|
|
|
|
|
|
Introduction To
Technical Drawing |
1 |
2 |
|
|
|
|
|
|
|
|
|
|
|
|
|
|
|
|
|
|
|
Scales |
1 |
2 |
|
|
|
|
|
|
|
|
|
|
|
|
|
|
|
|
|
|
|
Lineworks |
1 |
2 |
|
|
|
|
|
|
|
|
|
|
|
|
|
|
|
|
|
|
|
Lettering |
1 |
2 |
|
|
|
|
|
|
|
|
|
|
|
|
|
|
|
|
|
|
|
GeometryConstructional |
1 |
2 |
|
|
|
|
|
|
|
|
|
|
|
|
|
|
|
|
|
|
|
Orthograpiic
Projections |
1 |
2 |
|
|
|
|
|
|
|
|
|
|
|
|
|
|
|
|
|
|
|
Dimensioning |
1 |
2 |
|
|
|
|
|
|
|
|
|
|
|
|
|
|
|
|
|
|
|
Pictorial Projection |
1 |
2 |
|
|
|
|
|
|
|
|
|
|
|
|
|
|
|
|
|
|
|
Sectioning |
1 |
2 |
|
|
|
|
|
|
|
|
|
|
|
|
|
|
|
|
|
|
|
Development |
1 |
2 |
|
|
|
|
|
|
|
|
|
|
|
|
|
|
|
|
|
|
|
Final Exam ( 40%
) |
1 |
|
|
|
|
|
|
|
|
|
|
|
|
|
|
|
|
|
|
|
Isometric Drawing
There are many different types of
3-D drawings. One fairly simple way to get started drawing in
3-D is to try an isometric drawing. An isometric drawing
of a cube looks like this:
An easy way to draw objects in
isometric is to use an isometric grid, as shown below. On an
isometric grid, there are 3 types of lines: vertical lines, 30°
lines to the right, and 30° lines to the left. The drawing below
on the left shows an isometric grid; the drawing on the right
shows an isometric grid with a cube drawn on it. In all of these
drawings, the faces are shaded to make it look more "solid."
This kind of shading is not necessary, but you may do it if you
like.
|
|
![]()